本文将总结Google Map API使用中最简单也是最常用的一些操作以及相关的概念。如果你需要更加详细的信息,那么最好直接详细地阅读Google提供的关于Map的文档 .
在页面中引入Google Map 服务
在使用Google Map服务之前,我们必须在我们的页面中引入响应的脚本,在页面中插入:
1
2
3
< script type = "text/javascript"
src = "https://maps.google.com/maps/api/js?sensor=set_to_true_or_false" >
< /script>
其中sensor参数用于指明此应用程序是否使用传感器确定用户的位置。
异步加载Google Map API
我们也可以在需要使用Google Map服务的时候动态地添加资源,并指定回调函数:
1
2
3
4
5
6
7
8
9
10
11
12
13
14
15
16
17
18
function initialize () {
var myLatlng = new google . maps . LatLng ( - 34.397 , 150.644 );
var myOptions = {
zoom : 8 ,
center : myLatlng ,
mapTypeId : google . maps . MapTypeId . ROADMAP
}
var map = new google . maps . Map ( document . getElementById ( "map_canvas" ), myOptions );
}
function loadScript () {
var script = document . createElement ( "script" );
script . type = "text/javascript" ;
script . src = "http://maps.google.com/maps/api/js?sensor=false&callback=initialize" ;
document . body . appendChild ( script );
}
window . onload = loadScript ;
注意其中使用callback参数指定了回调函数名,其原理同JSONP
初始化Google Map对象
所有需要在页面中显示地图视图的行为都必须以初始化一个Map 对象为起点。每个Map对象的显示都需要指定一个页面中的dom结构作为容器,并给定一定的配置,如下面的代码所示:
1
2
3
4
5
6
7
var myLatlng = new google . maps . LatLng ( - 34.397 , 150.644 );
var myOptions = {
zoom : 8 ,
center : myLatlng ,
mapTypeId : google . maps . MapTypeId . ROADMAP
}
var map = new google . maps . Map ( document . getElementById ( "map_canvas" ), myOptions );
其中,map对象将id为map_canvas(主要,dom容器只要是一般的div等容器就可以)作为容器,并指定了初始化配置信息 。上例中的配置信息包括:
zoom: 地图的缩放级别
center: 地图中心位置
mapTypeId: 用户指定地图显示类别
位置对象LatLng
在Google Map API使用中,我们经常需要对经纬度坐标进行操作,而所有的操作都会被封装成LatLng 对象,其构造方法为:
1
var myLatlng = new google . maps . LatLng ( 维度 ( latitude ), 经度 ( longitude ));
地图显示常用操作
有了Map对象后,我们可以通过调用其方法对地图的显示做调整,下面介绍常用的几个方法:
setCenter(LatLng) 设置地图显示中心的位置
setZoom(Number) 设置地图的缩放级别
fitBounds(LatLngBounds ) 使得地图显示适应指定的包围盒…(翻译的不好,就是使得一个指定的矩形区域能在地图中显示出来)
其中fitBounds方法在我们需要在地图上显示多个结果的时候非常有用。使用方法也非常简单。
假设我们现在有这么写个坐标位置:
1
2
3
4
5
6
7
var beaches = [
[ 'Bondi Beach' , - 33.890542 , 151.274856 , 4 ],
[ 'Coogee Beach' , - 33.423036 , 151.259052 , 5 ],
[ 'Cronulla Beach' , - 34.028249 , 121.157507 , 3 ],
[ 'Manly Beach' , - 33.80010128657071 , 151.28747820854187 , 2 ],
[ 'Maroubra Beach' , - 33.450198 , 151.259302 , 1 ]
];
那么我们只须先构造一个空的Bounds对象,然后将这些坐标一一添加进这个Bounds就能得到一个同时包含这里所有点的Bounds了:
1
2
3
4
5
6
7
8
9
10
var bounds = new google . maps . LatLngBounds ();
var beach ;
var latLng ;
var i ;
for ( i = 0 ; i < beach = beaches [ i ]; i ++ ) {
latLng = new google . maps . LatLng ( beach [ 1 ], beach [ 2 ]);
Bounds . extend ( latLng );
}
其中extend的作用就是扩展Bounds以使得给定的坐标位置被包含进去。
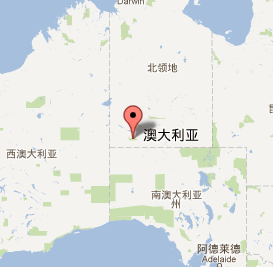
向地图中添加图标
本快内容主要分为两块,添加标记Marker 和添加信息窗口infoWindow ,
添加标记
每个标记都是一个google.maps.Marker对象,在实例化时需要给定一定的配置信息,如标记的位置。下面的例子中直接在配置信息中制定了显示的Map对象。我们也可以通过Marker对象的setMap方法来制定显示在那个map实例中。要隐藏标记时,只需设置setMap(null)便可:
1
2
3
4
5
6
7
8
9
10
11
12
13
14
var myLatlng = new google . maps . LatLng ( - 25.363882 , 131.044922 );
var myOptions = {
zoom : 4 ,
center : myLatlng ,
mapTypeId : google . maps . MapTypeId . ROADMAP
}
var map = new google . maps . Map ( document . getElementById ( "map_canvas" ), myOptions );
var marker = new google . maps . Marker ({
position : myLatlng ,
map : map ,
title : "Hello World!"
});
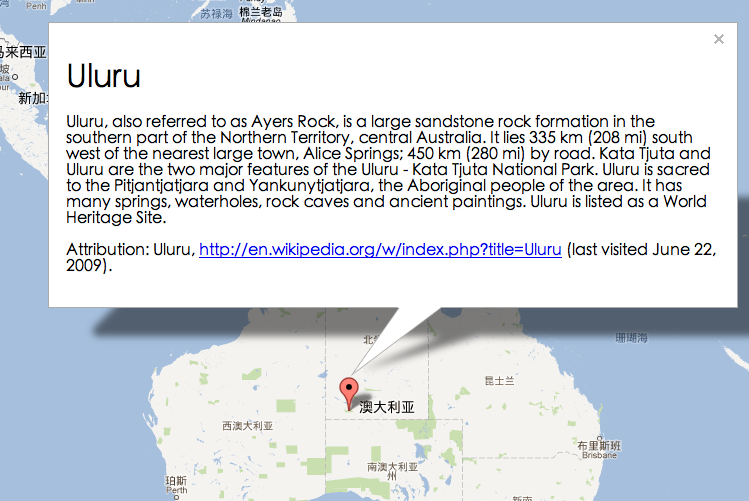
添加信息窗口
每个信息窗口都是一个google.maps.InfoWindow对象,在实例化时需要给定一定的配置信息,如窗口中的内容,标记的位置。
其中需要说明的是,配置信息中的content即可以是html字符串,也可以是一个dom节点。要让一个信息窗口显示出来,我们可以调用它的open方法,并制定显示在那个Map实例对象中。注意,如果在信息窗口构造时的配置中已经制定了位置(通过position字段),那么直接使用infoWindow.open( map ),就可以显示在地图的制定位置上。当然,我们也可以将信息窗口的显示绑定在已经在地图中的标记对象中,只需在open的第二个参数中制定标记对象即可infoWindow.open( map, marker ),如下面代码中所示:
1
2
3
4
5
6
7
8
9
10
11
12
13
14
15
16
17
18
19
20
21
22
23
24
var myLatlng = new google . maps . LatLng ( - 25.363882 , 131.044922 );
var myOptions = {
zoom : 4 ,
center : myLatlng ,
mapTypeId : google . maps . MapTypeId . ROADMAP
}
var map = new google . maps . Map ( document . getElementById ( "map_canvas" ), myOptions );
var contentString = 'Hello World' ;
var infowindow = new google . maps . InfoWindow ({
content : contentString
});
var marker = new google . maps . Marker ({
position : myLatlng ,
map : map ,
title : "Uluru (Ayers Rock)"
});
google . maps . event . addListener ( marker , 'click' , function () {
infowindow . open ( map , marker );
});
事件绑定
使用google.maps.event.addListener()方法来进行事件的监听。该方法接受三个参数:一个对象,一个待侦听事件以及一个在指定事件发生时调用的函数。
举几个例子,更加详细的介绍参考文档 。
监听地图的缩放:
1
2
3
google . maps . event . addListener ( map , 'zoom_changed' , function () {
/* 状态改变时间不提供回调参数,我们需要去手动获取数值,比如利用map.getZoom()来获取当前的缩放级别 */
});
标记的点击:
1
2
3
google . maps . event . addListener ( marker , 'click' , function ( event ) {
placeMarker ( event . latLng );
});
监听dom事件:
1
google . maps . event . addDomListener ( window , 'load' , initialize );
另外关于事件需要补充的一点是,当我们初始化map的时候,其div为不显示的,之后通过某种逻辑过程显示出来时,其地图在容器中的显示会出现不完整的情况,这时候我们需要告诉组件去重新设置显示区域的大小:
Developers should trigger this event on the map when the div changes size: google.maps.event.trigger(map, ‘resize’)
地址解析
Google Map API 本身已经提供了非常方便的地址解析与反地址解析的方法,使用方法非常简单:
实例化一个google.maps.Geocoder对象,调用Geocoder.geocode()方法,在其回到中获取结果:
1
2
3
4
5
6
7
8
geocoder . geocode ( { 'address' : address }, function ( results , status ) {
if ( status == google . maps . GeocoderStatus . OK ) {
/* do somethind */
} else {
alert ( "Geocode was not successful for the following reason: " + status );
}
});
此处介绍一些第一个参数中最重要的两个字段,根据不同的搜索需求,我们每次只需要给定其中一个参数即可:
address (required*) — 你需要解析的地址
latLng (required*) — 你需要解析的LatLng对象
两种方式的结果返回值格式都一致,具体格式可以看文档